
The Importance of Timing
Timing is everything when it comes to harvesting cannabis. Harvesting too early or too late can affect the potency and overall quality of your buds. Here are some key indicators to help you determine the right time to harvest:
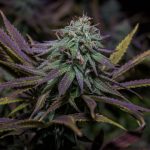
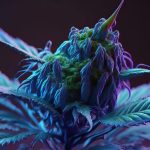
- Trichome Color:
- Clear Trichomes: If the trichomes (tiny resin glands) are clear, the plant is not yet ready for harvest.
- Milky White Trichomes: When the trichomes turn milky white, the plant is at its peak potency. This is the ideal time to harvest for maximum THC content.
- Amber Trichomes: As trichomes turn amber, the THC begins to degrade into CBN, which has a more sedative effect. Harvesting at this stage can result in a more relaxing high.
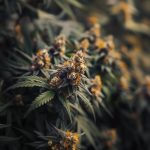
- Pistil Color:
- White Pistils: If the pistils (hairs) are still white and upright, the plant is not ready for harvest.
- Darkened Pistils: When the majority of pistils have darkened and curled in, the plant is nearing its harvest window.
- Leaf Condition:
- Yellowing Leaves: As the plant approaches maturity, the fan leaves may start to yellow and die off. This is a natural part of the plant’s life cycle and can indicate that harvest time is near.

Harvesting Techniques
Once you’ve determined that your cannabis plants are ready for harvest, it’s time to cut them down. Here are some steps to follow:
- Preparation:
- Tools: Gather sharp pruning shears, gloves, and a clean workspace.
- Environment: Ensure your workspace is clean and well-ventilated to prevent mold and contamination.
- Cutting the Plants:
- Whole Plant Harvest: Cut the entire plant at the base and hang it upside down to dry. This method is simple and effective for small-scale growers.
- Branch-by-Branch Harvest: Cut individual branches and hang them separately. This method allows for more even drying and is suitable for larger plants.
- Trimming:
- Wet Trimming: Trim the leaves immediately after cutting the plant. This method can speed up the drying process but may be more labor-intensive.
- Dry Trimming: Allow the plant to dry before trimming the leaves. This method can result in a smoother, more flavorful final product.
Drying Cannabis
Proper drying is essential to preserve the potency and flavor of your cannabis. Here are some tips for effective drying:
- Environment:
- Temperature: Maintain a temperature of 60-70°F (15-21°C) in the drying area.
- Humidity: Keep the humidity level between 45-55% to prevent mold and mildew.
- Airflow:
- Ventilation: Ensure good airflow in the drying area to prevent stagnant air and mold growth. Use fans if necessary, but avoid direct airflow on the plants.
- Spacing: Hang the plants or branches with enough space between them to allow for proper air circulation.
- Drying Time:
- Duration: Drying typically takes 7-10 days, depending on the size and density of the buds. The buds should feel dry to the touch but not brittle.
- Testing: To test if the buds are dry, try bending a small branch. If it snaps rather than bends, the buds are ready for curing.
Curing Cannabis
Curing is the process of slowly removing the remaining moisture from the buds while preserving their flavor and potency. Proper curing can take several weeks but is essential for achieving high-quality cannabis. Here are the steps for curing:
- Preparation:
- Containers: Use airtight glass jars or specialized curing containers. Avoid plastic containers, as they can affect the flavor.
- Environment: Store the jars in a cool, dark place with a temperature of 60-70°F (15-21°C) and humidity of 55-65%.
- Filling the Jars:
- Loosely Packed: Fill the jars loosely with dried buds, leaving some space at the top for air circulation.
- Sealing: Seal the jars tightly to create an airtight environment.
- Burping the Jars:
- Daily Burping: For the first week, open the jars daily for 10-15 minutes to release excess moisture and allow fresh air in. This process is known as “burping.”
- Monitoring: Check the buds for any signs of mold or mildew during this period. If you notice any issues, remove the affected buds immediately.
- Long-Term Curing:
- Extended Curing: After the first week, reduce the frequency of burping to once every few days. Continue this process for at least 2-4 weeks, or longer if desired.
- Quality Check: Properly cured buds should have a pleasant aroma, smooth flavor, and enhanced potency.
Tips for Success
To ensure the best results when harvesting and curing cannabis, keep these tips in mind:
- Patience: Rushing the drying and curing process can result in harsh, low-quality buds. Take your time to achieve the best results.
- Cleanliness: Maintain a clean workspace and tools to prevent contamination and mold growth.
- Monitoring: Regularly check the drying and curing buds for any signs of mold or mildew. Address any issues promptly to prevent further damage.
- Storage: Once the curing process is complete, store the buds in airtight containers in a cool, dark place. Proper storage will help maintain the quality and potency of your cannabis.
Conclusion
Harvesting and curing cannabis are essential steps that significantly impact the final product’s quality, potency, and flavor. By carefully timing your harvest, using proper techniques for cutting and drying, and patiently curing your buds, you can achieve high-quality cannabis that meets your expectations. Whether you’re a novice grower or an experienced cultivator, following these guidelines will help you produce the best possible cannabis.


